How to use the Meta Generator App?
Settings
Starting from the dashboard, you can choose settings. These settings have been configured bij Induxx at roll-out. Normally, you won’t make any changes yourself.
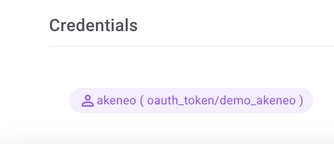
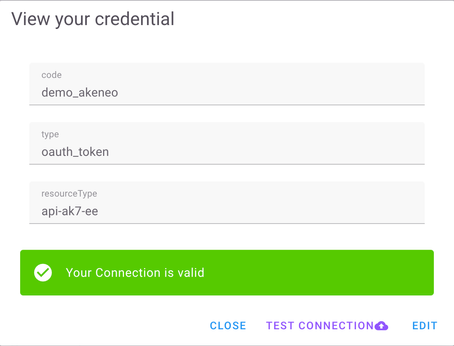
On the bottom of the settings page you’ll find the credentials needed to let the app access the data in Akeneo. When you click akeneo the credential view opens.
 operations
Here you can test the connection if you suspect a connection problem.
If necessary, you can edit the credentials here.
operations
Here you can test the connection if you suspect a connection problem.
If necessary, you can edit the credentials here.
Operations
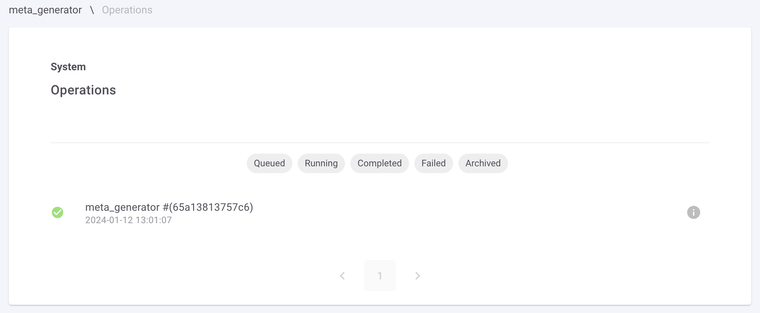
Starting from the dashboard, you can choose operations. At Operations you get a view of the meta generator operations performed. By operation we mean the execution of a configured task. These can be performed repeatedly.
You can select one or more filters by clicking on them:
- Queued: the imports that are still queued.
- Running: the imports that are in progress.
- Completed: imports that have been completed successfully.
- Failed: the imports that have generated errors.
- Archived: the imports that have been archived.
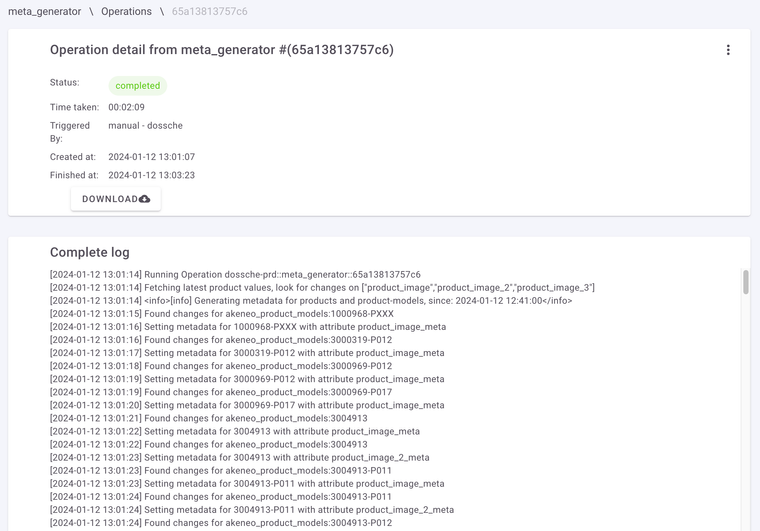
If you do not select a filter, you will see all operations. When you click on such operation, you will see the log.
By clicking on the 3 dots on the right you can choose to delete or archive the import. Of course, this only concerns the log and not the uploaded files.
Tasks
Starting from the dashboard, you can choose tasks. Here you can create tasks to run mannually or to schedule them for automatic execution.
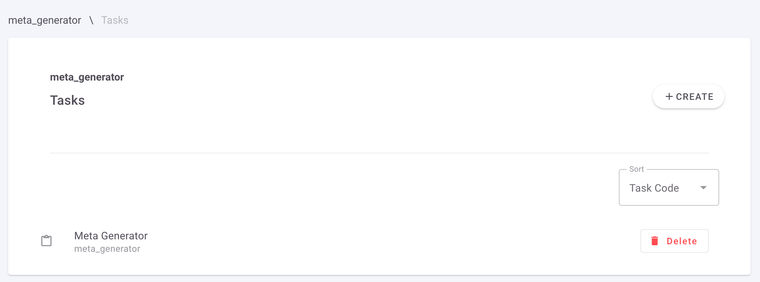
Choose Create to create a new task. Give you task a logical name and choose meta_generator as your task type.
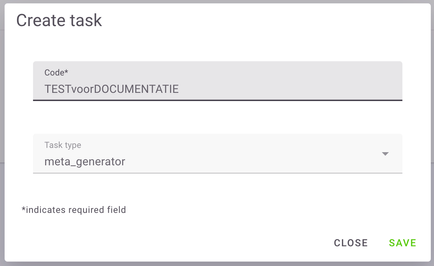
When you press save you can enter the following options:
- Task label: a logical name for your task.
- Time condition: what criteria must be met by the specified attributes to be included in the operation (= execution of a specific task at a specific time with specific parameters).
- No date condition: none; so take all images.
- Updated over the last n days: take all images updated over the last n days.
- Updated n minutes ago: take all images updated during the last n minutes.
- Updated since last completed job: include all images updated since the last time an operation for the job was run and successfully completed.
- Time condition value: is shown only if “Updated over the last n days” or “Updated n minutes ago” was taken as time condition. Here you have to fill in the value of n.
- Image attribute: this is a multiple selection where you can select from a dropdown all image attributes for which you want to generate the meta data.
- Mapping: here you enter for all selected image attributes the attribute code of the meta data field provided in Akeneo.
- Meta filter: here you specify which meta data you want to see generated.
- Everything (**)
- Width and Height (ex: “256;130”)
- Width
- Height
(**) When you choose to save all meta data, the generated string looks like this: {“0”:400,“1”:300,“2”:2,“3”:“width="400" height="300"”,“bits”:8,“channels”:3,“mime”:“image/jpeg”}
- 0 = width (in this case “400”)
- 1 = height (in this case “300”)
- 2 = type, with these possible values:
| Value | Mapping | Value | Mapping | Value | Mapping |
|---|---|---|---|---|---|
| 0 | unknown | 7 | TIFF_II | 14 | IFF |
| 1 | GIF | 8 | TIFF_MM | 15 | WBMP |
| 2 | JPEG | 9 | JPC | 16 | XBM |
| 3 | PNG | 10 | JP2 | 17 | ICO |
| 4 | SWF | 11 | JPX | 18 | COUNT |
| 5 | PSD | 12 | JB2 | ||
| 6 | BMP | 13 | SWC |
- 3 = width and height as html attributes
- bits = highest bit depth found in the image
- channels = 3 for RGB images and 4 for CMYK images
- mime = mime type of the image